Hi there!
I want to share to you how I came up with a SIGN UP FORM using MAILCHIMP. Before, I used to create sign up form for Facebook Ads using benchmarkemail. I was used to that it was so easy for me to create those forms. I even used benchmark in my email campaigns. But a terrible thing happened. My account in benchmarkemail was suspended! Oh my! It was terrible for me because I had more than 100 email addresses stored in my email list. Luckily, I was able to download those email addresses, oh yes!
You want to know the reason of my account’s suspension? hmmmm, “due to nature of my business”. Hahaha! Maybe I think I used to place amounts in my sign up forms though the text was in “Tagalog”. I think they researched those “Tagalog” words to “English” words. hmmmm. I thought of opening another benchmarkemail account. But I got an idea. Why not explore other programs or sites that offer creation of sign up forms! So I asked my friend online if mailchimp is ok. She told me it is so ok and easy.
Now, I decided to make use of Mailchimp for creating my sign up form. Last night I slept late just to watch youtube videos about how to create sign up forms in mailchimp. The basics was easy but there were two things that were unresolved to me:
1. Where to paste the “url” of the website after entering the email addresses
2. Where to paste the “url” of my Thank you page( from my website) to where I place my facebook conversion pixel.
Though last night these two things were unresolved, I told myself to take a night sleep and do it again in the next morning. Luckily, I threw away my doubt and fears and instead, commit myself to resolve these two things so that I can create sign up forms for my next Facebook Ads. And so I did it again! Being an explorer is a great attitude! I did it and I will share it to you how I did it.
Go to http://www.mailchimp.com and register there.
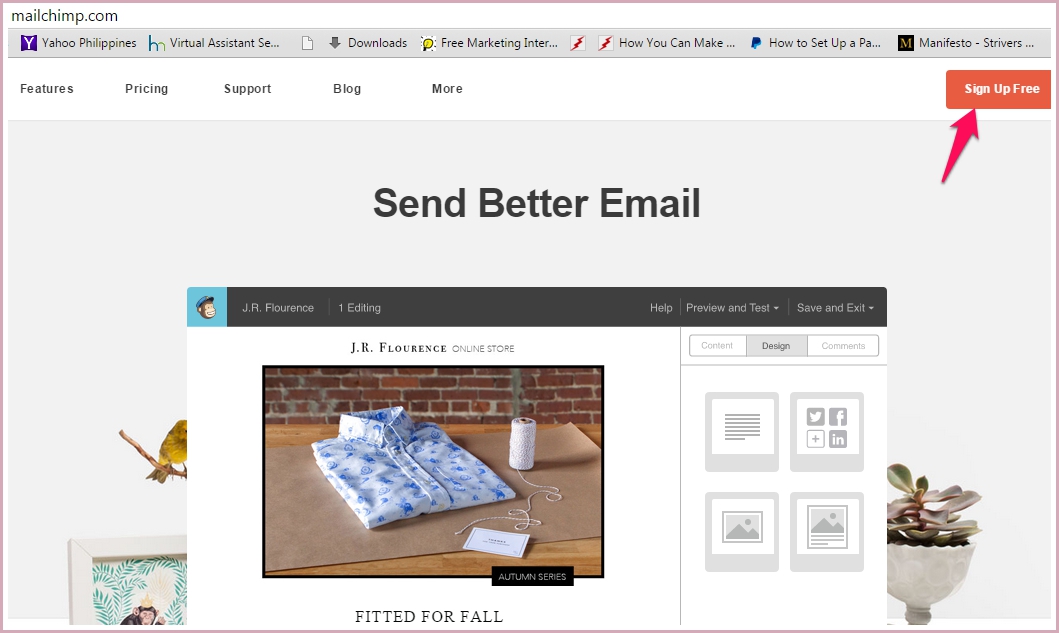
Click the “Sign Up Free.”
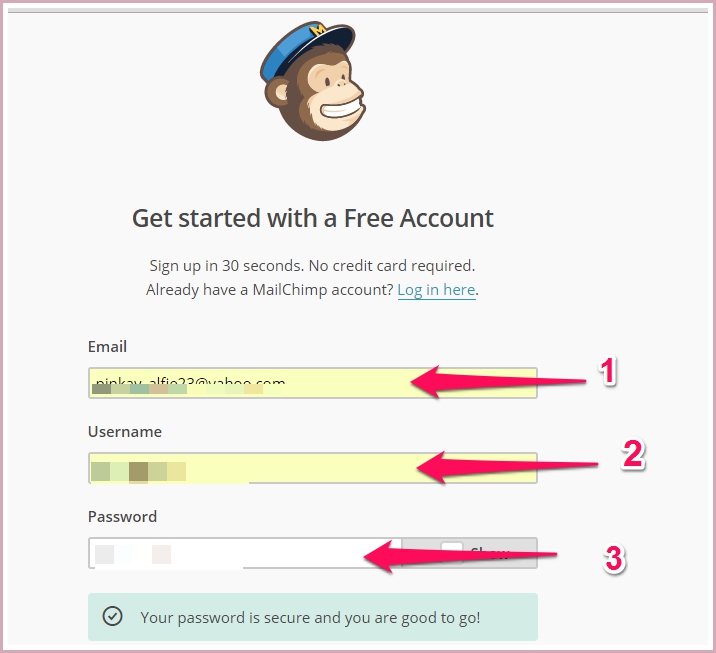
Put your:
1. email address
2. username
3. password
Then click the “Create Account.”
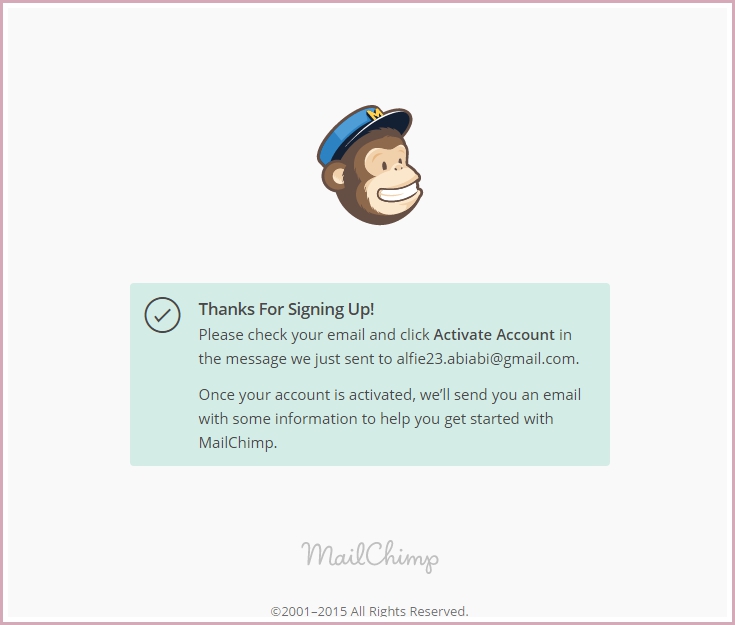
You will receive a notification as shown above. You go to your email address and click confirm it to start using your mailchimp account.
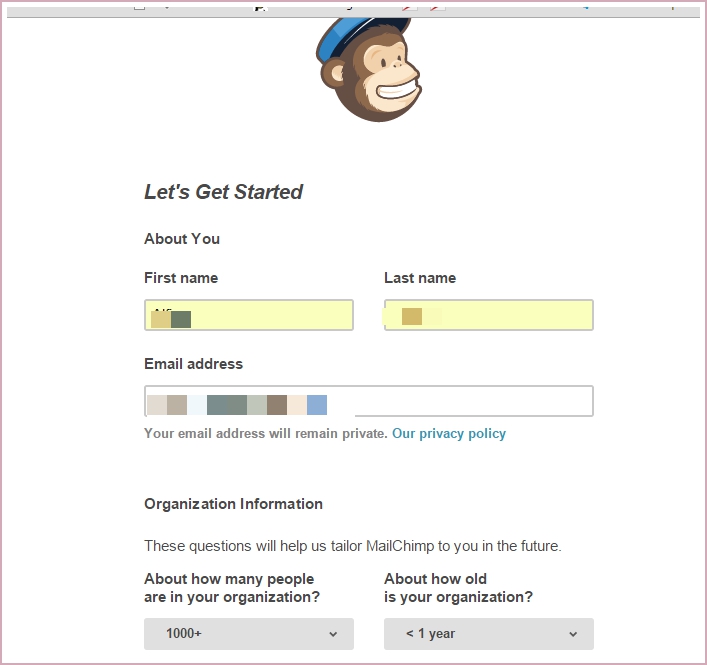
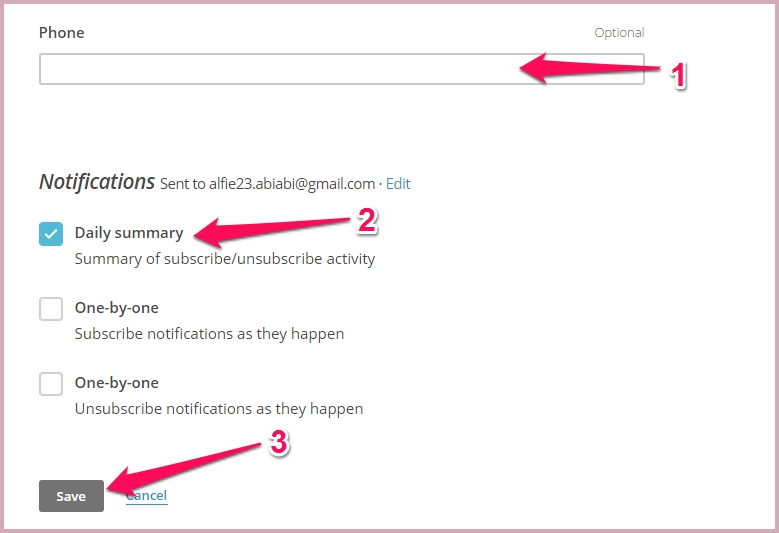
You will be directed to another screen as shown above and fill up the necessary details.
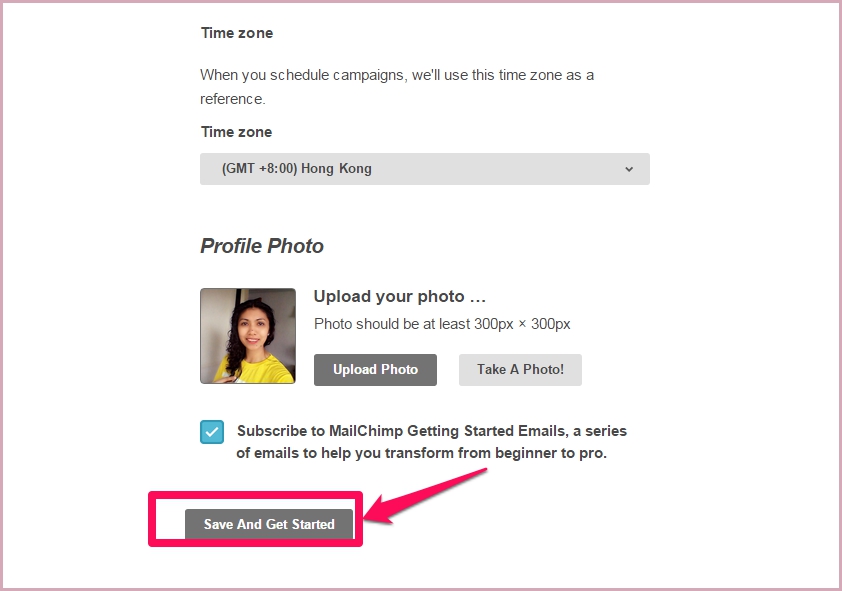
After filling up, click the “Save and Get Started.”
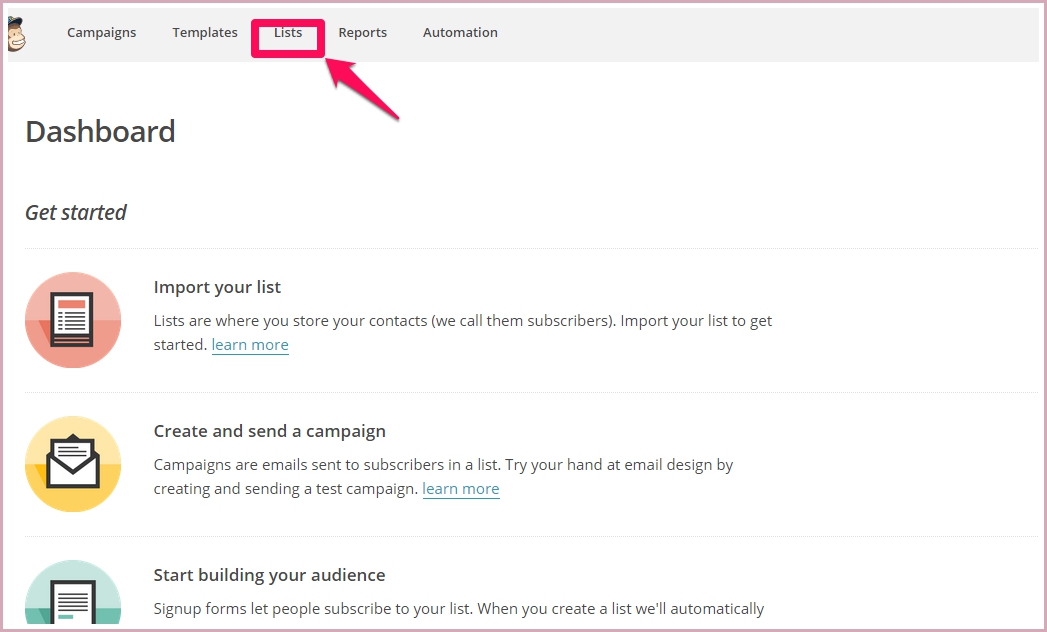
Go to the “Lists” as shown above to create list for your sign up form.
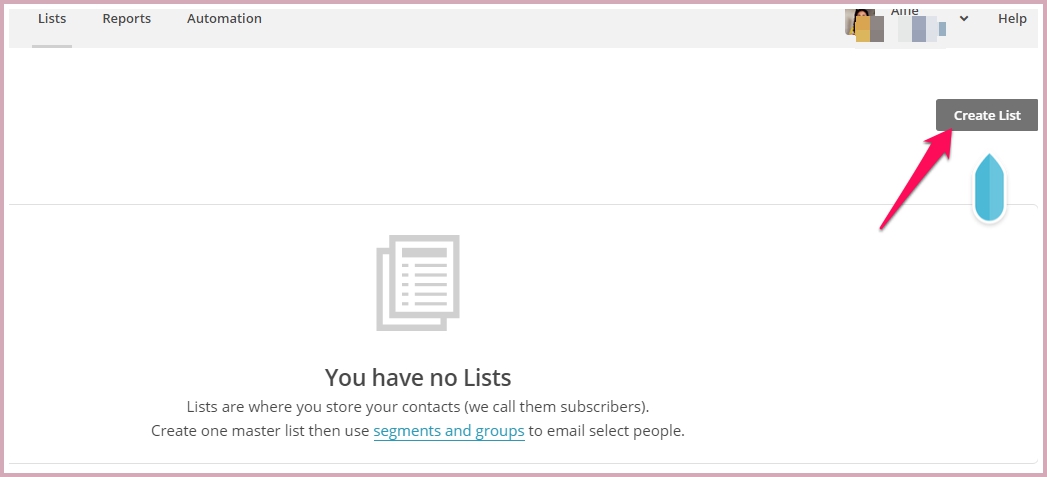
Click “Create List.”
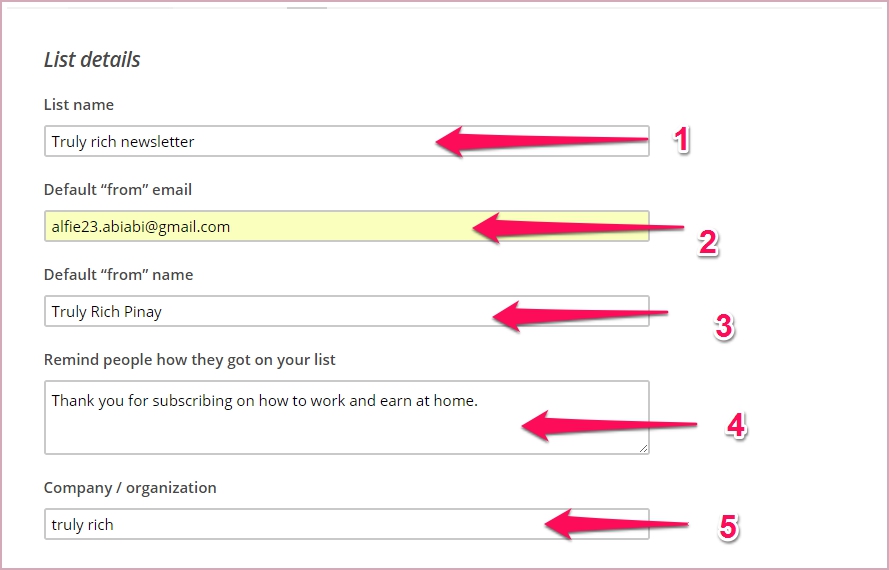
Fill up the necessary fields in creating your list, as shown above.
After filling up all necessary fields, click “Save.”
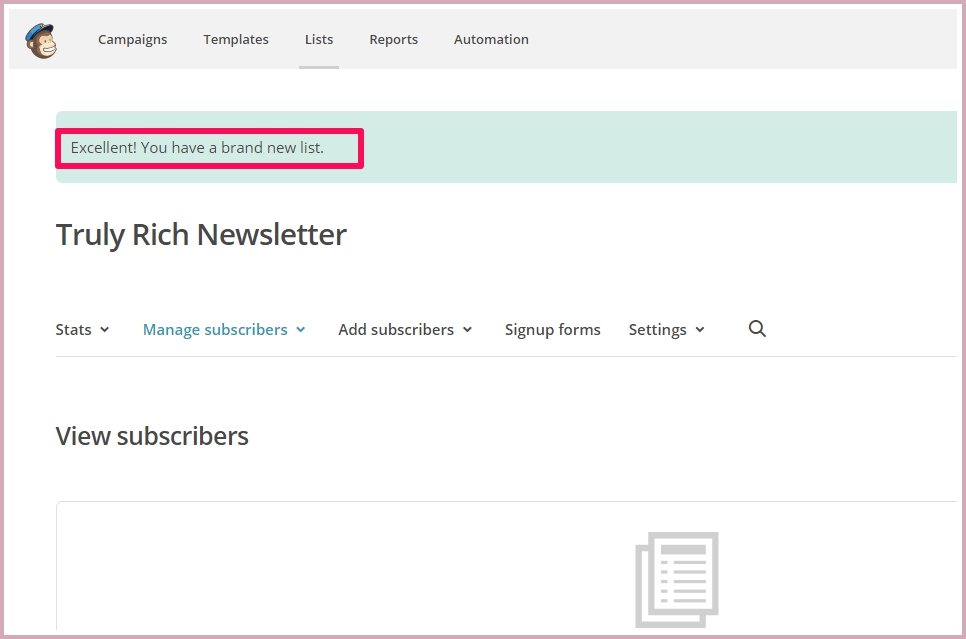
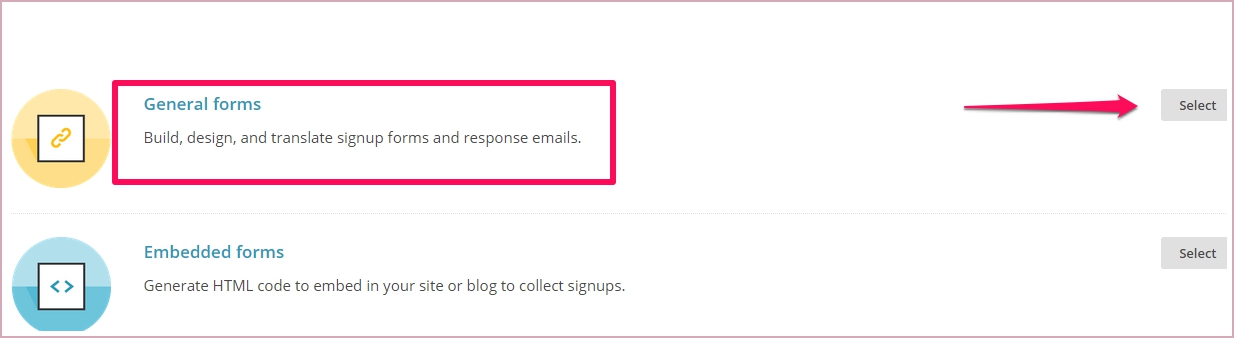
You will see a notification shown above. Then go to “Signup forms.”

Choose “General forms” and click “Select.”
Go to “Build it.”
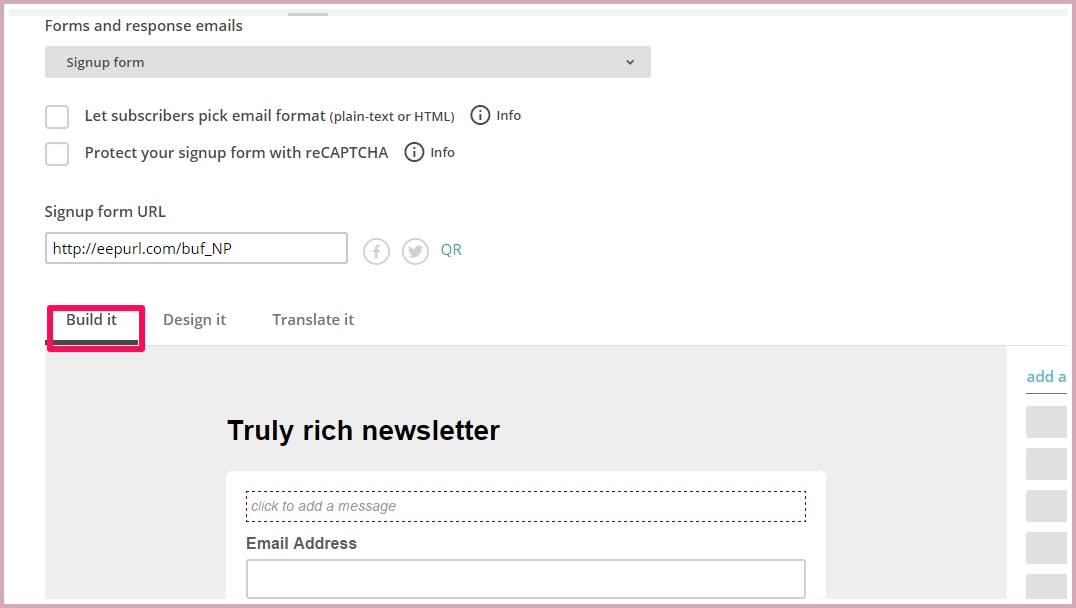
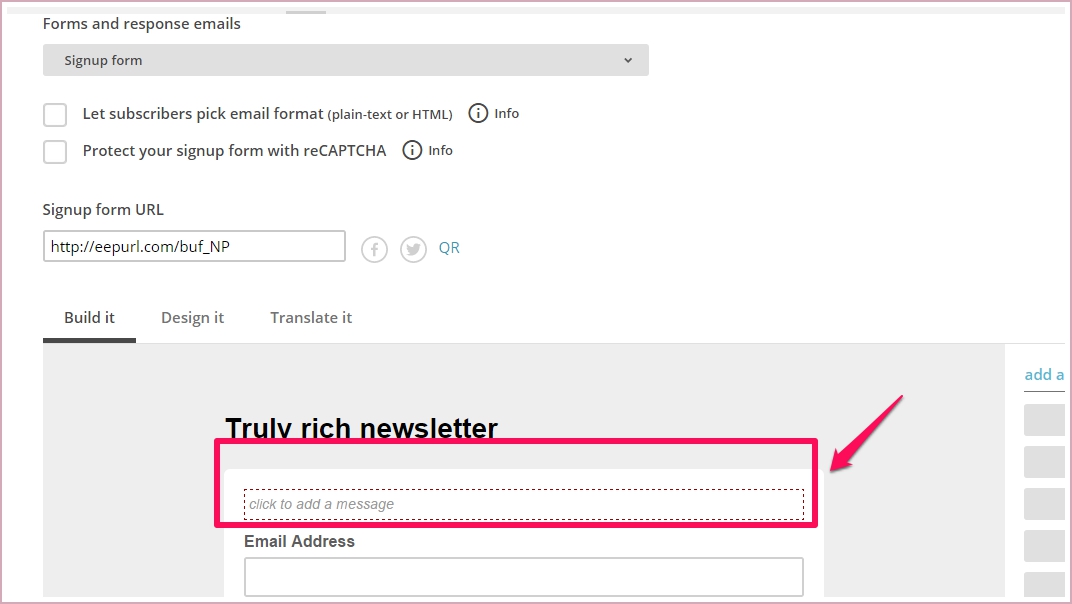
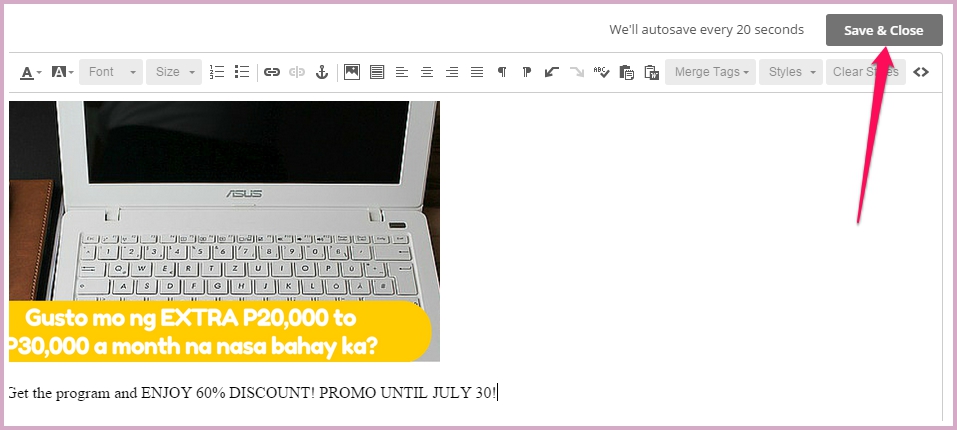
Click to add message and image.
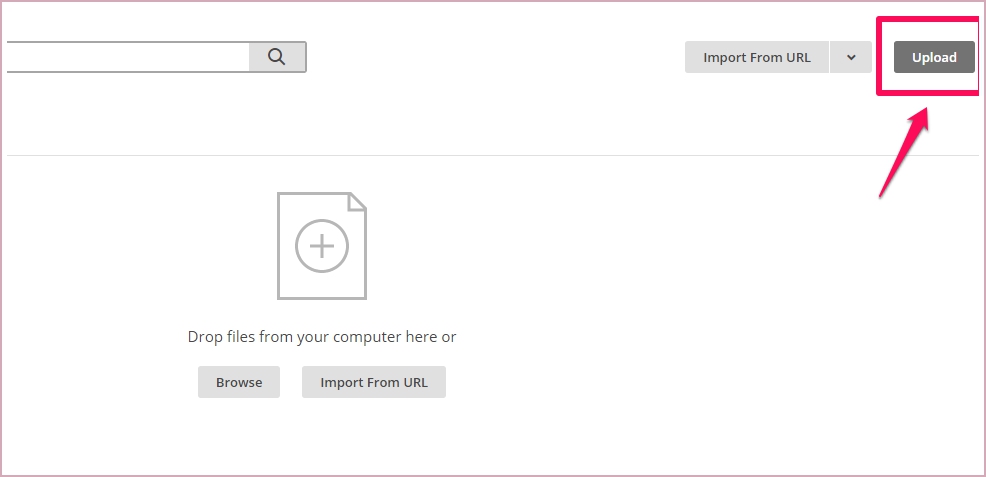
To upload pictures, click the icon below.

Click “Upload” to upload images.
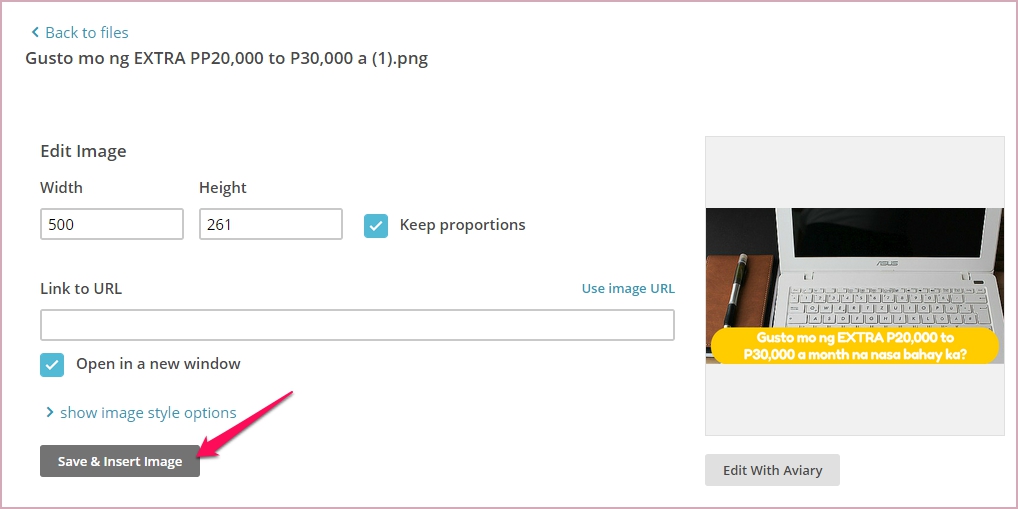
Adjust the width and height of the picture.

Click “Save & Insert Image.”
Put text below the image.
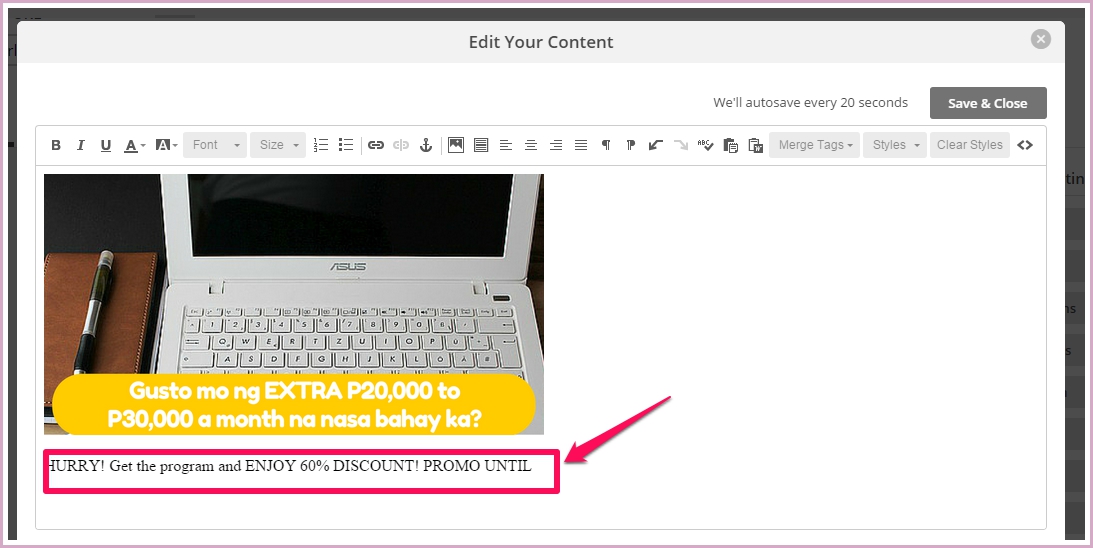
Click “Save & Close.”
Remove the “Last Name” by clicking “-”
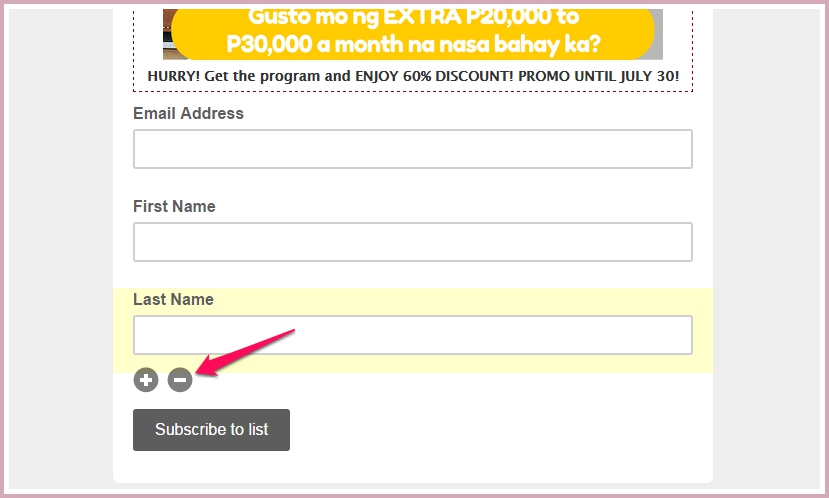
Remove also the heading above the sign up form.

Now we are going to design the form. Go to “Design it.”
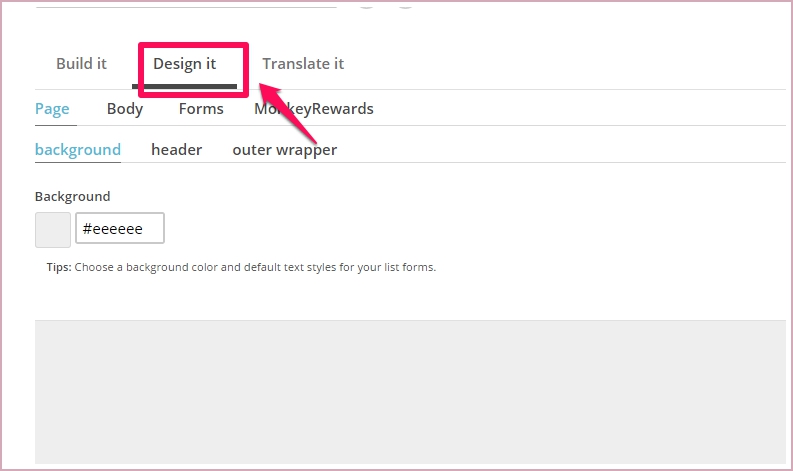
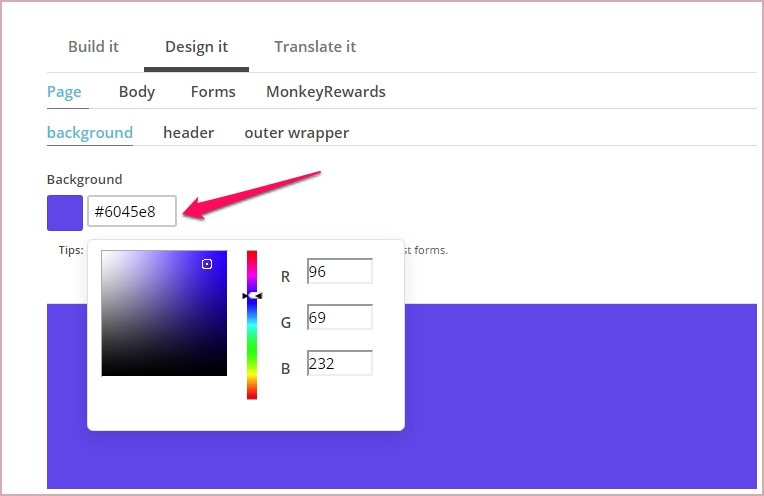
Change the background color and click it.
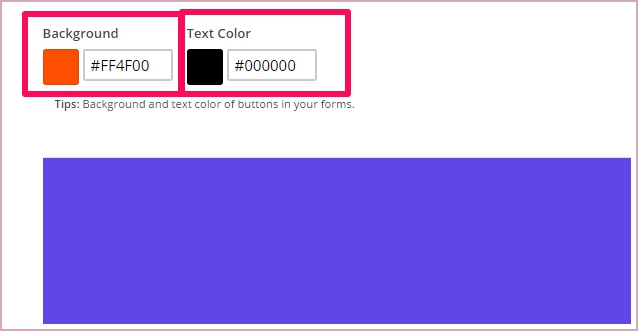
Under “Forms” change the background color and text color.
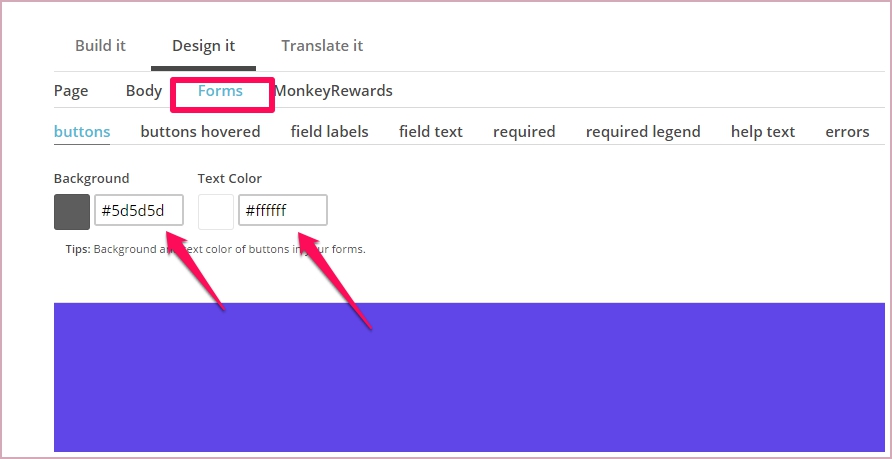
This is to emphasize the color of the click “Button.”
Select the Background and Text Color.
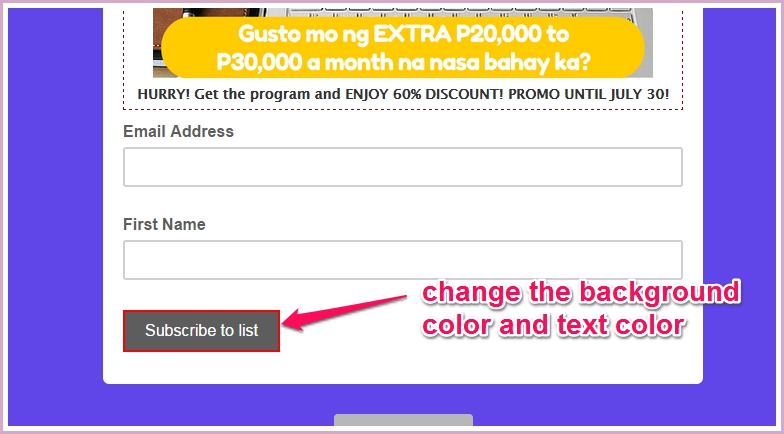
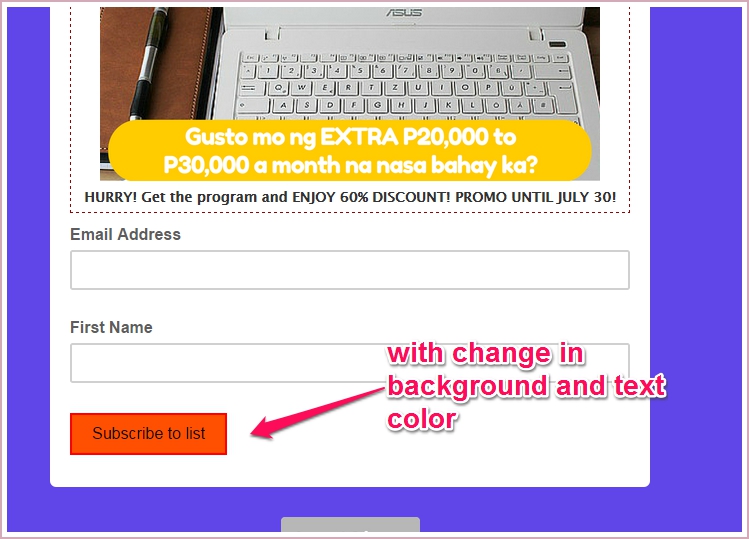
You can see the change of color of button text below.
Go to “Translate it.”
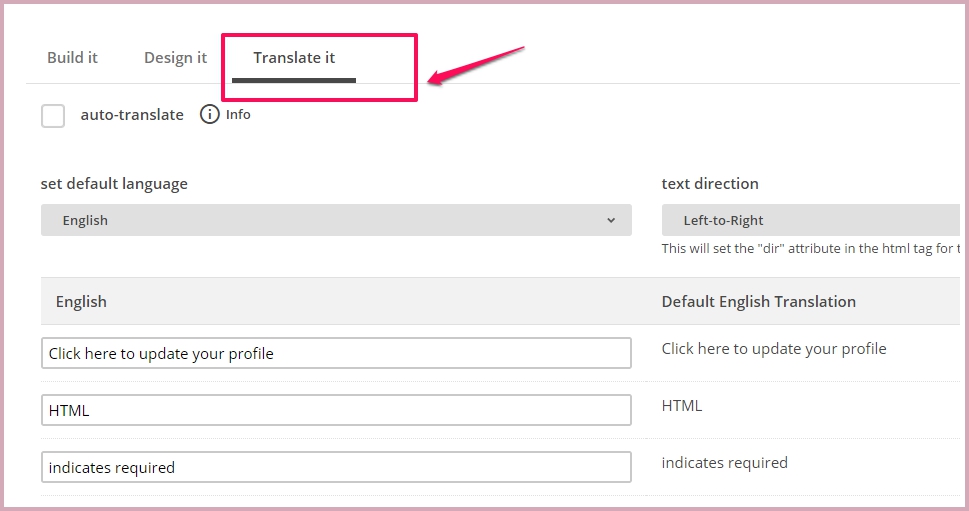
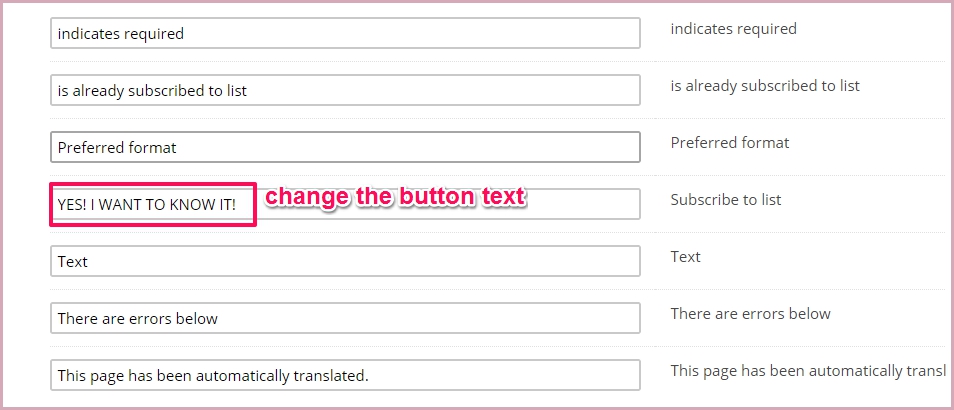
Change the button text.
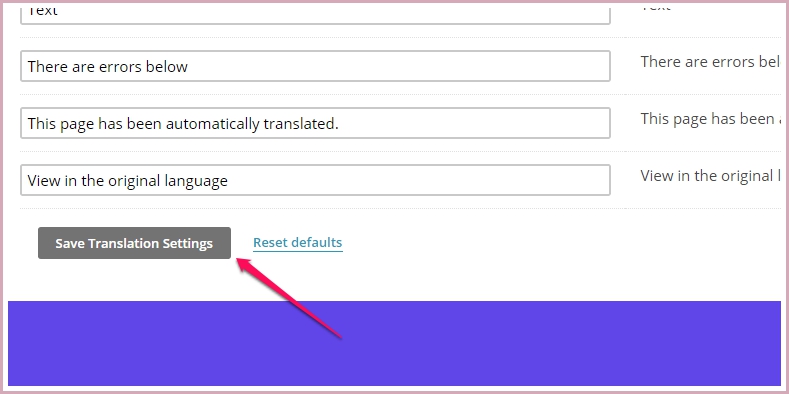
Click “Save Translation Settings.”
Now, you can see the color change and the text of the “click button text.”

Go to “Signup thank you page.”
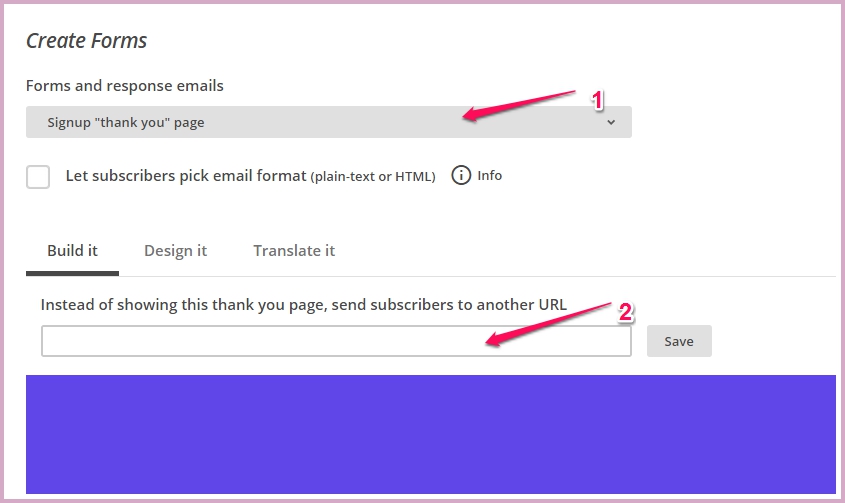
Paste the “url” of your website. This is to redirect the subscriber after placing his email address and clicking the button text.
Click “Save.”
Then go to “Confirmation thank you page.”

Place the “url” of your THANK YOU PAGE from your website. The Thank you page is where you will paste the conversion pixel from creating Facebook Ads.
Click Save.”

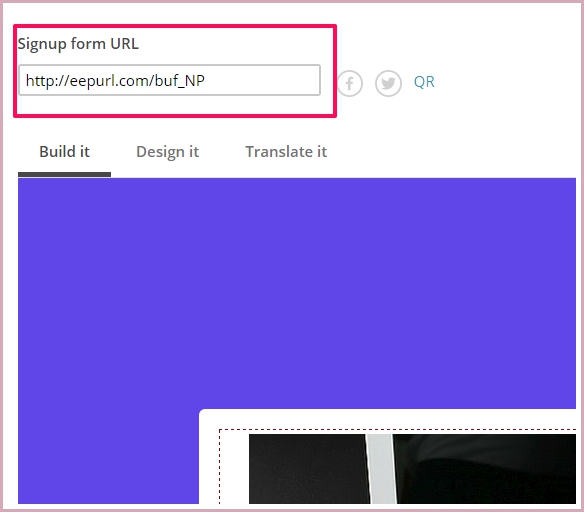
You will see below the url of your signup form.
This url will be pasted in creating your Facebook ads in Facebook.
I just Copy and Paste the url in another tab, and walaah! You can view now your finished Mailchimp Signup Form.
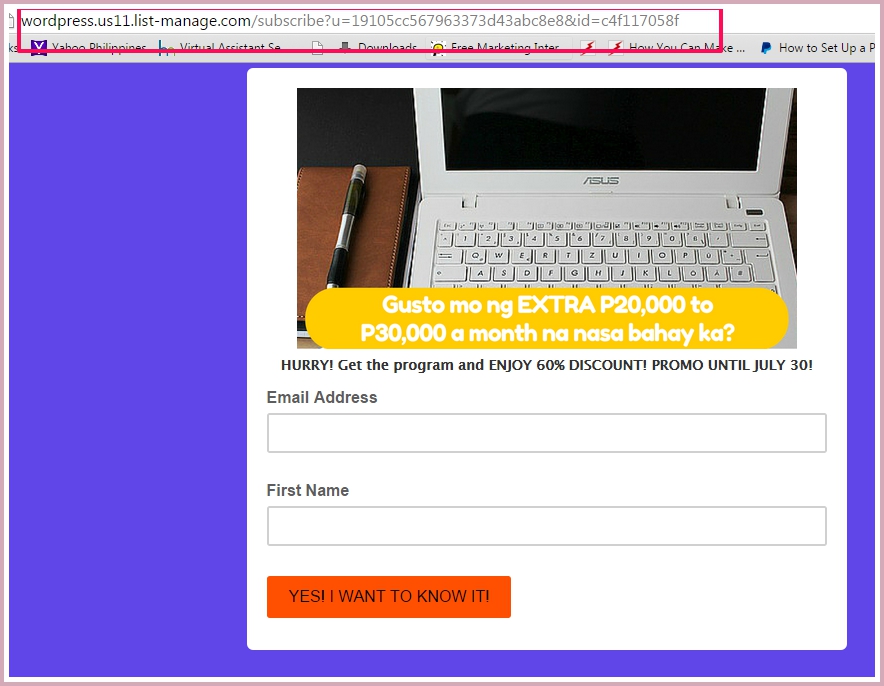
See, this is just easy and fun! Hope you do enjoy my simple step by step guide in creating signup form using Mailchimp!
See yah!
