Here yeh!!! I am here again to share to you, this time it is all about targeting our audience in facebook.
This is how to create CUSTOM AUDIENCE.
I have been studying this lately, researching on how to create the custom audience. This is a crucial part since you will be promoting your business products or services to a particular custom audience, whom you believe need your products or services. The best way to narrow the audience is to custom your audience to specifically target them to your Facebook Ads. There are 2 things which are important in building your CUSTOM AUDIENCE:
1.Understand what you offer
2.Understand who you want to target to.
Now let’s start the ball rolling.
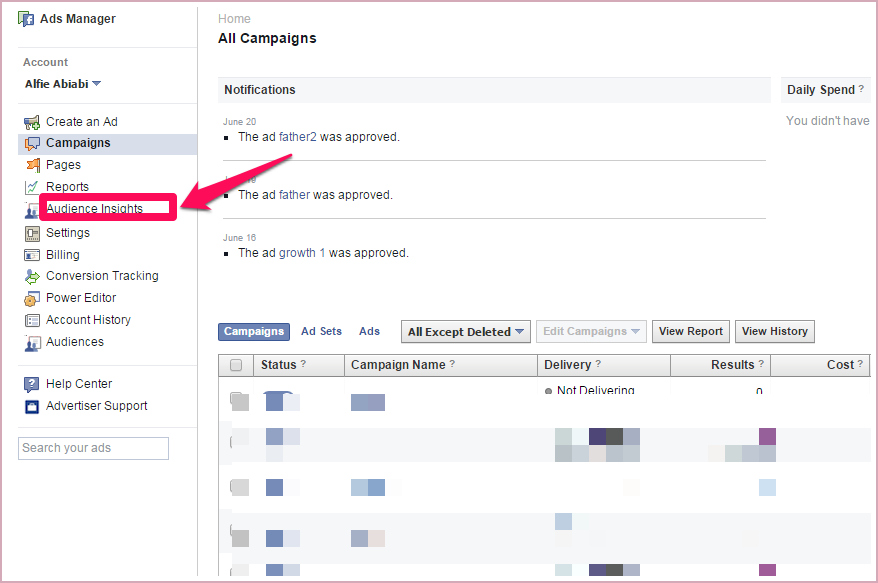
Go to your Ads Manager of your Facebook Account. Here for illustration purpose, I have shown here my Facebook Account. Then you click “Ads Manager.”

This is the next screen you will see:

Then under your “Ads Manager” is “Audience Insights.” Click that one.
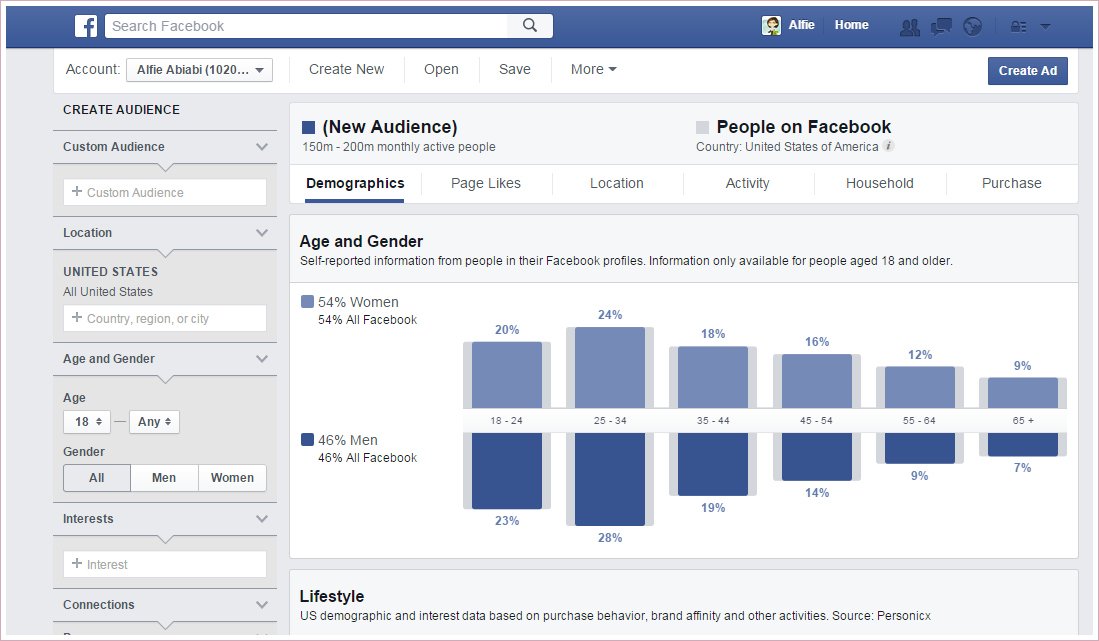
You will see a pop up after clicking “Audience Insights.” Choose “Everyone in Facebook” and click it.

You will be directed to this next screen:
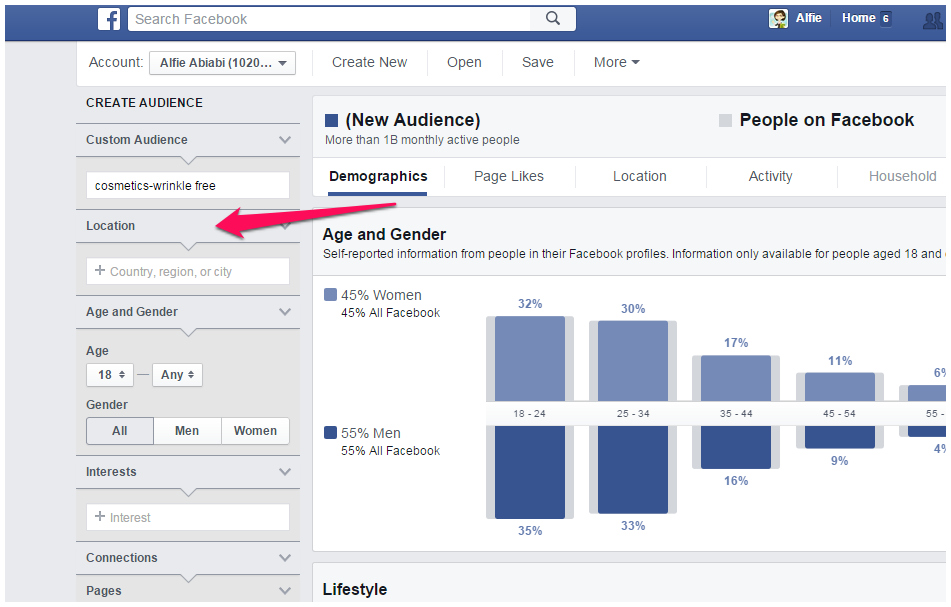
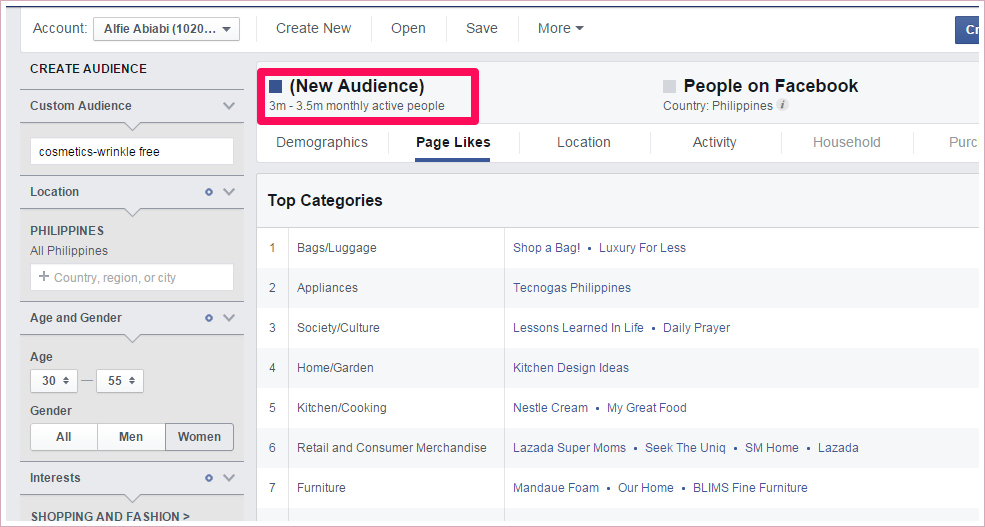
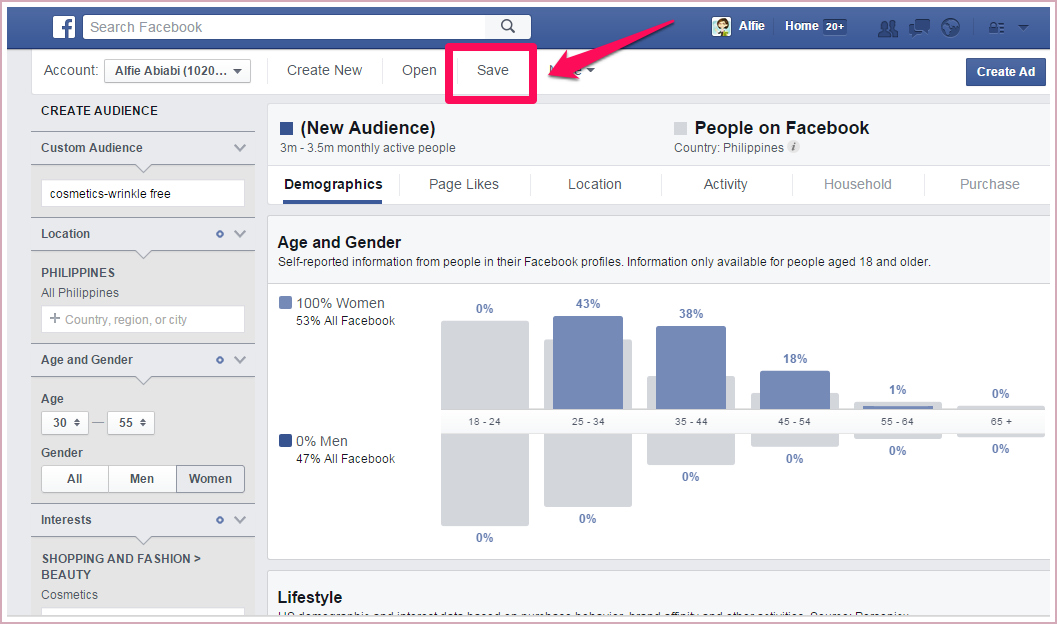
This is where you can create your “Custom Audience.” Now for illustration purpose, we will create custom audience based on our product, for example, Cosmetics which is a “wrinkle free product.” See the image below:
We will create our audience on this product for our Facebook Ads and customize it based on the product “cosmetics- wrinkle free.” We will target it here in country, Philippines, with ages 30 to 55 years old.
So now the next thing to do is to go to “Custom Audience.”

Name your “Custom Audience.”
Here we name it “cosmetics-wrinkle free.”

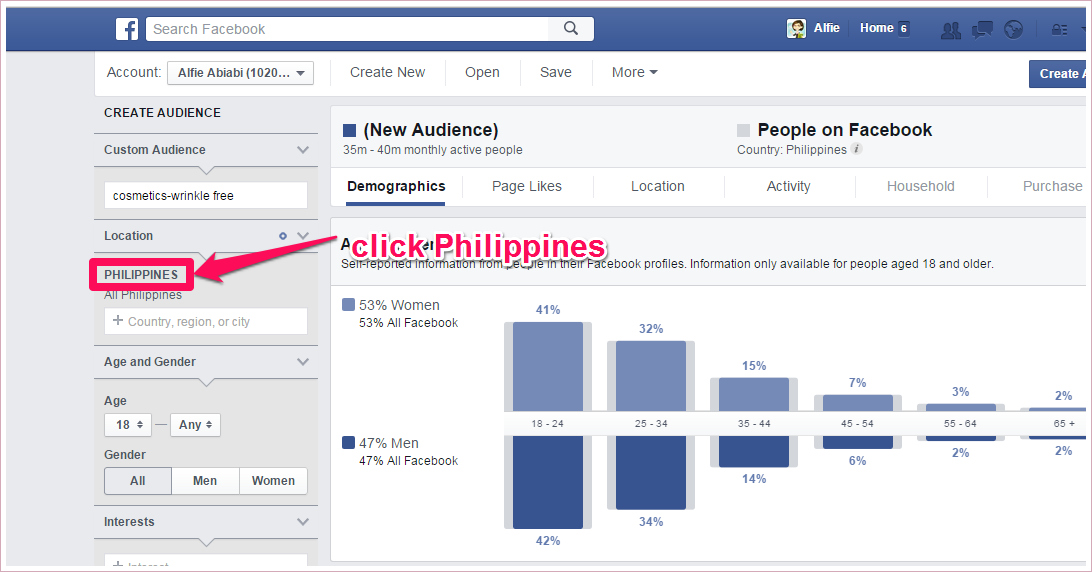
Next is “Location.”
Here we will choose “Philippines.”
Then click “Philippines” as the location for our Facebook Ads targeting.
Then next is “Age” of the audience.
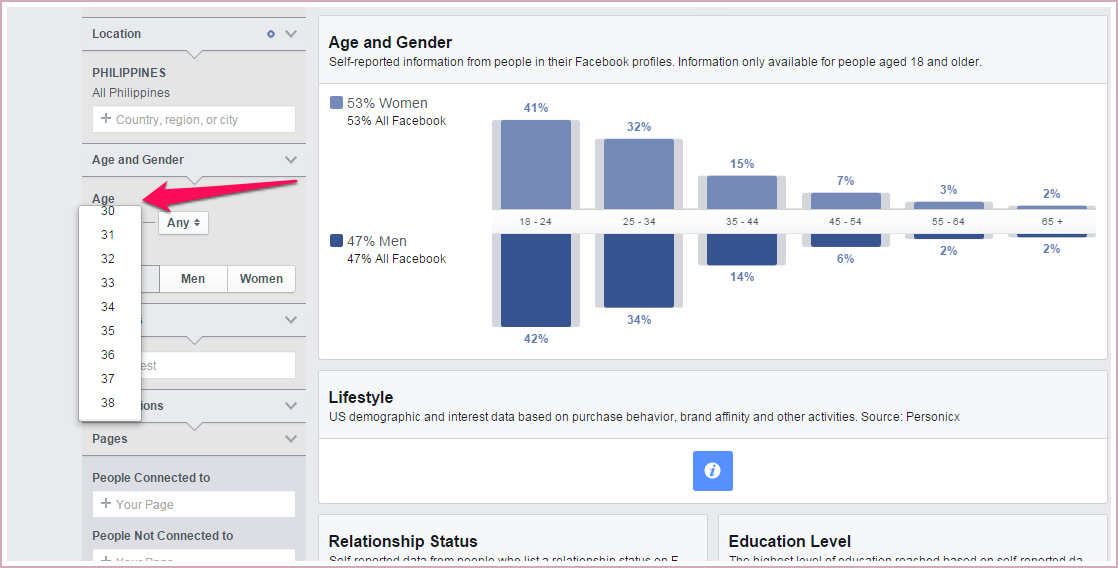
Here we will choose ages 30 to 55 for illustration purpose for our product cosmetics.
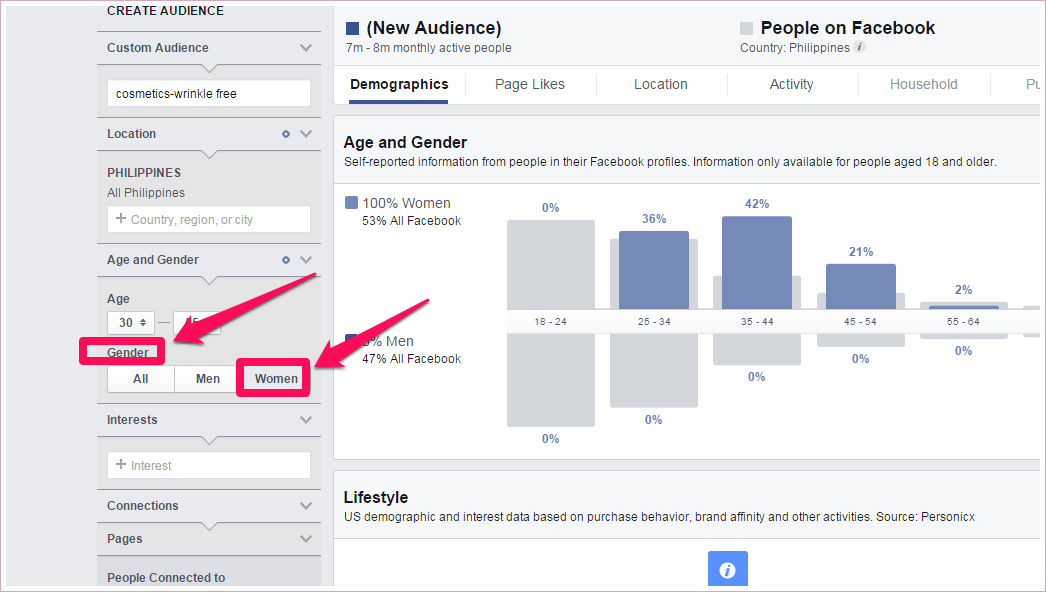
Then next is “Gender.”
We will choose “Women” here for cosmetics-wrinkle free market.
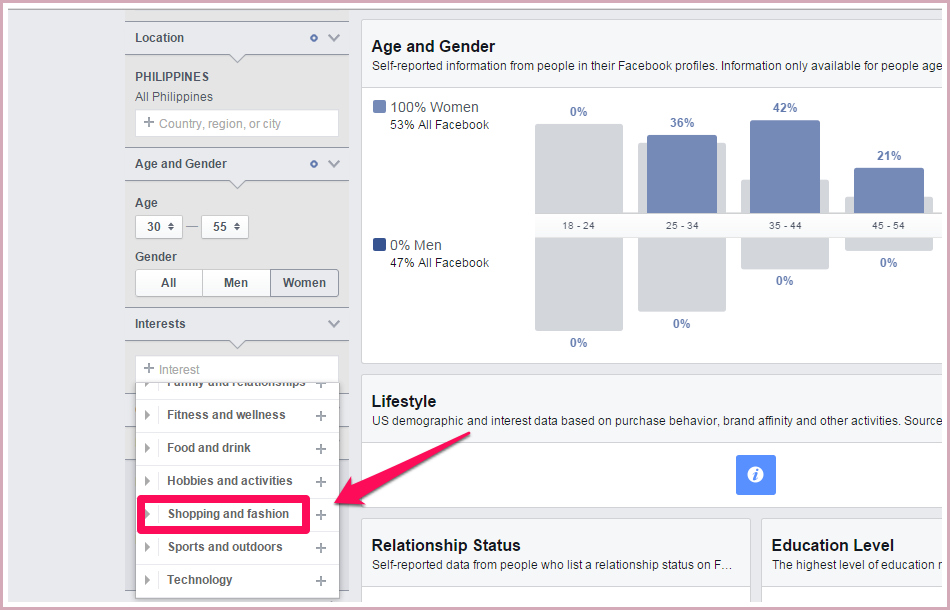
Then next is the box “Interest.”
Here we should know the interest of our target custom audience of our product. Does our market like shopping, like sports, entertainment, etc.?
Then click “Interest.”
Then choose “Shopping and fashion.”
Then click “Beauty.”
Under “Beauty” you can see “Cosmetics.”
Click it.

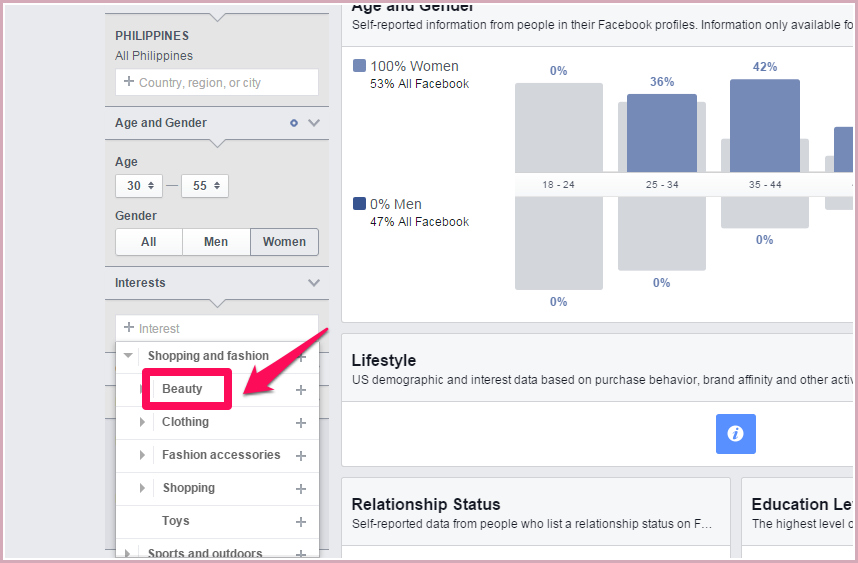
Since our product is all about cosmetics, we will target audience, the “women” who have interest in cosmetics.
Now we have partial creation of our custom audience and you can see a partial information or insights about your target audience.
Below you can see that age bracket of women, 25-34 are 43% compared to ages 35-44 which is 38%.

You can also see number of your audience above, from 3 million to 3.5 million based on the custom audience you created.
The Relationship status of your market, which is “Married” as the highest. The education level is 76% college graduate and only 17% are high school. Meaning those 76% has the edge to buy also the product because they finished schools and most of them have jobs and when they have work, they have salary and they can buy your product.

Actually you can browse your partial custom audience you created.
You can see the tabs above and click demographics, page likes, location, activity, household and purchase to further study and narrow down your audience.

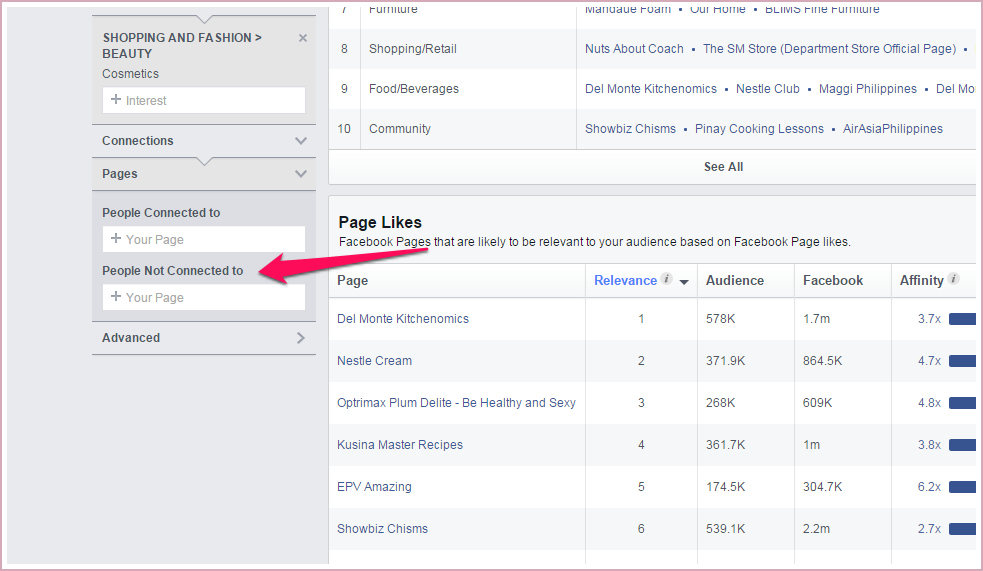
The next thing we do is to choose whether we want our audience to be connected to our page or not. See it below:

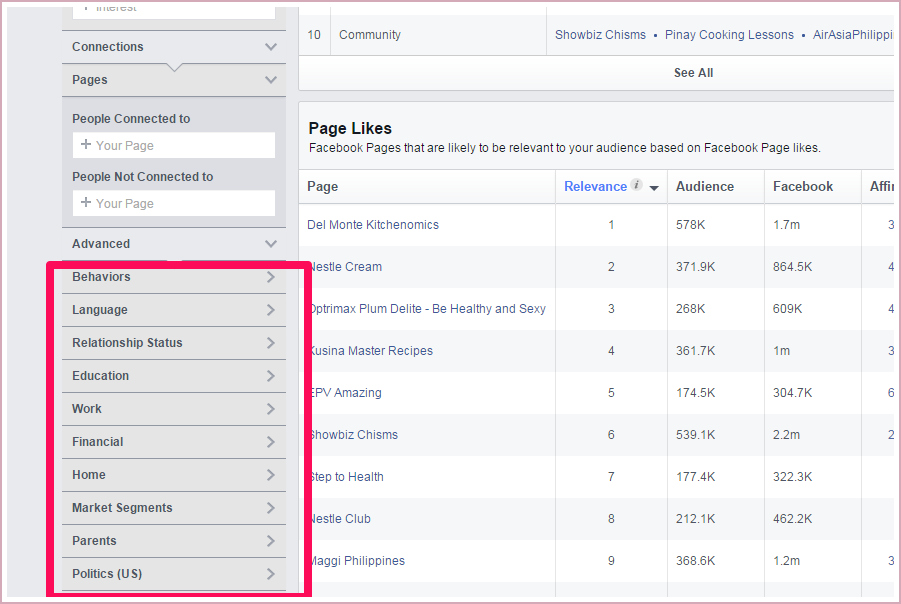
You can also use the “Advanced” portion to specify more of your audience.
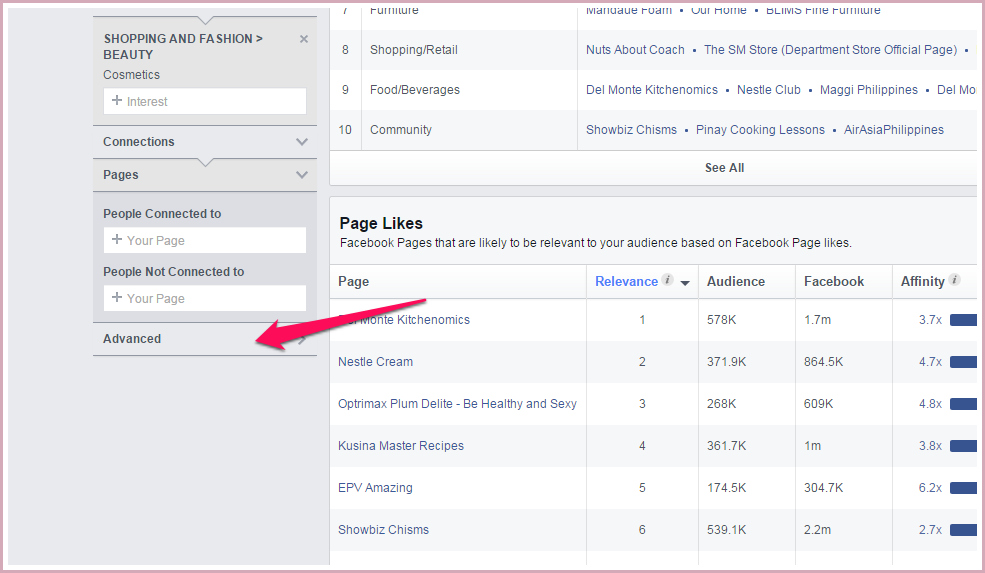
Under the tab “Advanced,” you can see items specified to further narrow your audience. These are behaviors, language, relationship and status, education, work and etc.
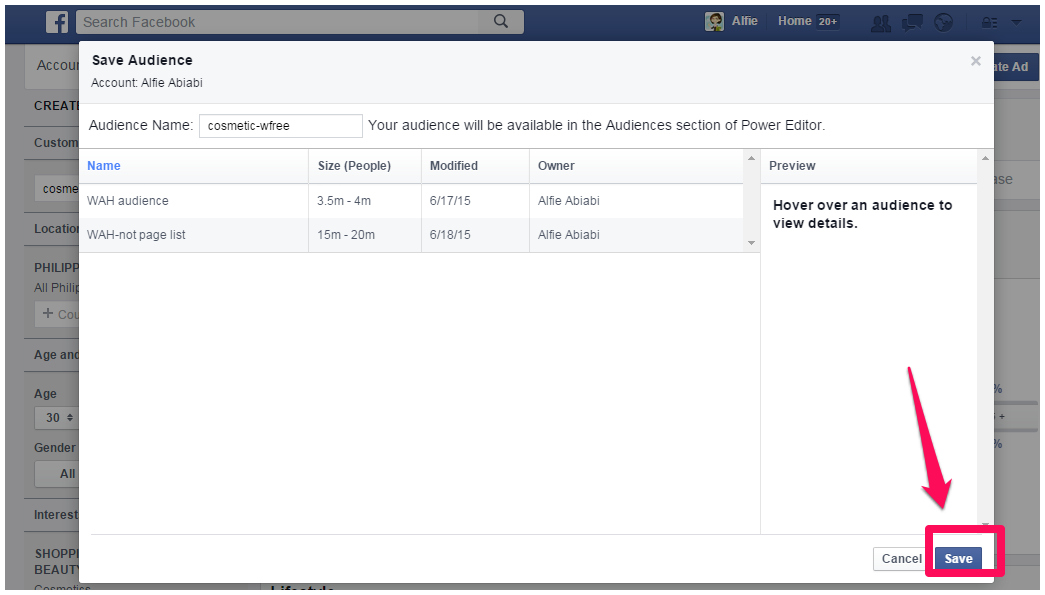
After creating our criteria for our “Custom Audience,” we will now click “Save.”
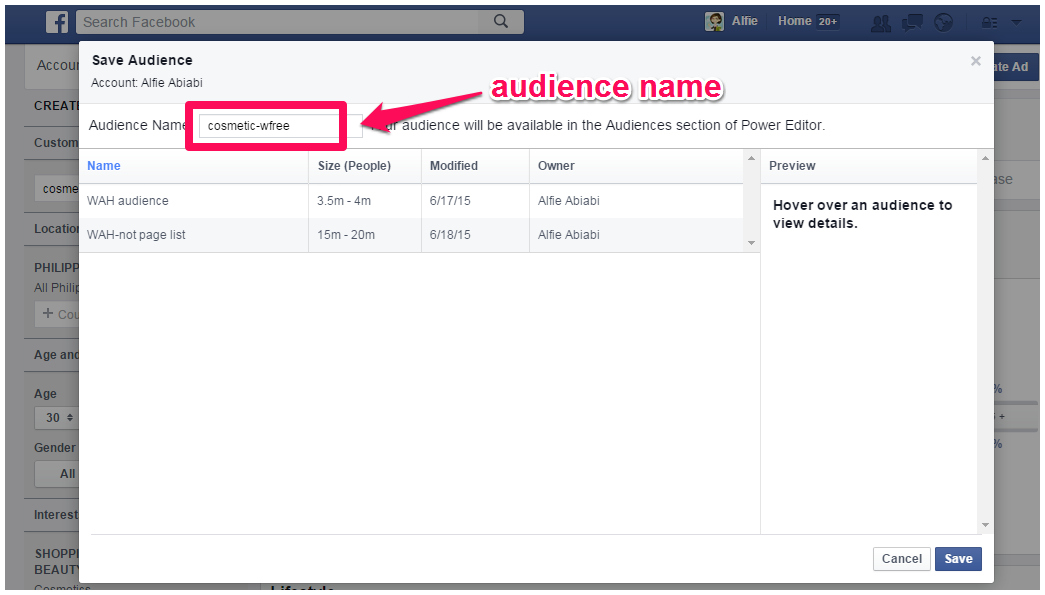
Name our custom audience as “cosmetic-wfree.”
This custom audience we created will be seen in our “Power Editor” under “Ad Sets” and “Audience.”
We will just select the custom audience we created, “cosmetic-wfree.”
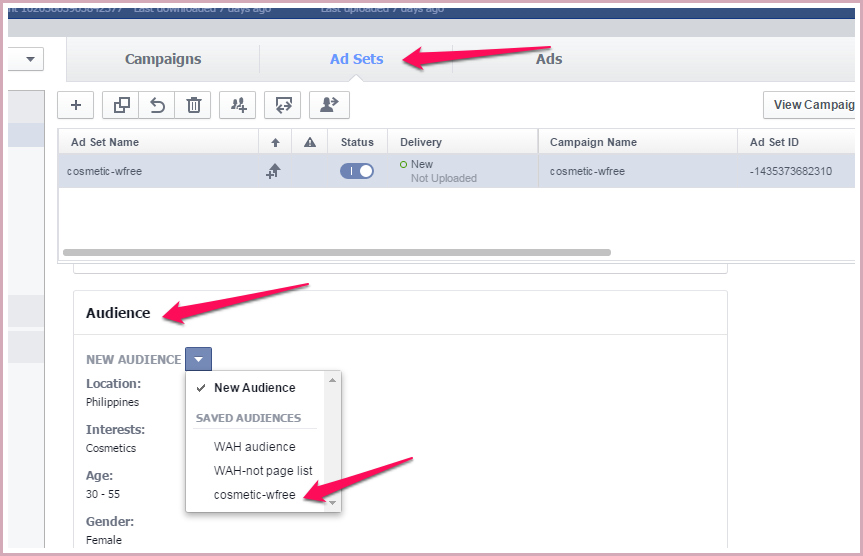
We can also edit the saved “cosmetic-wfree” audience that we created if we want to add or delete some items to narrow down our target market.
See, that is how simple and easy to create our CUSTOM AUDIENCE. I hope I served to help you by showing this tutorial for your Facebook Ads marketing.
Hey, I will always share to you helpful tools, sooner if I discover something beneficial about Facebook marketing. Just stay in tune and wait for further details.!
Thanks a lot!
