Now I am ready to share to you how I created my Facebook ads: “Happy Family” batch 2 in Power Editor. This version is the one I personalized to compare the happy family, which I posted before.
To personalize an ad , Kuya Jomar Hilario shared insights on how to do it properly and effectively:
Rule: You should only change one thing when you create a “challenger” ad from the “original” ad. We will improve the results of our ads by making “challenger” ad. We have the original ad right? The one I presented before, the “happy family?” Now I made a “challenger” ad to improve the results. There are 2 ways to do this:
1. Change of the heading, but still the same image.


This was the one I made before which was the “happy family.” Both of them has the same image, but different heading. And the most number of conversions between the two is still the “happy family” ad which resulted to 9 conversions versus “happy family” batch 2 with zero conversion. This means that “happy family” ad which was the “original ad” is more effective than the “happy family ” batch 2, the “challenger” ad.
2. The second one is to change the image, but still the same heading.

You notice that there were no different image and different heading, at the same time. This is an effective way to A/B test an ad. So it is not good to change image and heading at the same time, in comparing the result, like this one:

Remember again, to compare results, it is not proper to have different image and different heading, all at the same time. It is not effective in A/B test an ad.
Now, I have shared to you how to personalize your ads, to compare the results of “original” ad and “challenger” ad.
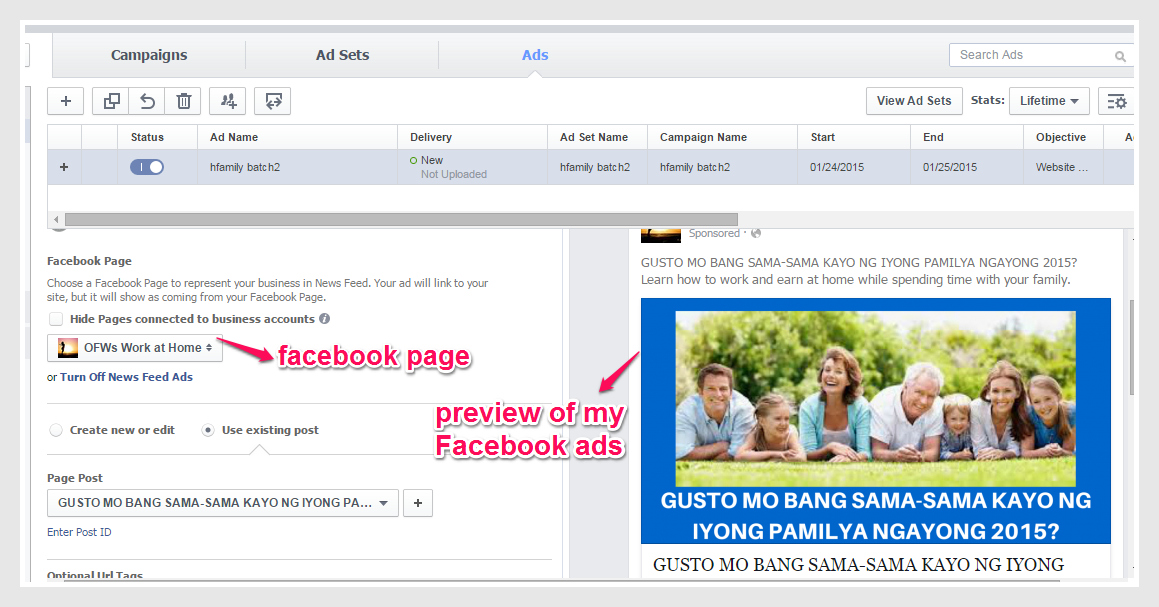
Back to my new ad, the “challenger” ad, I chose the “OFWs Work at Home” page to post my Facebook ads.

Then I click “Back to Ads” to create my campaign, ad sets and ads.
Always remember that the campaign, ad set and ad name must be the same for proper identification. Make it simple that it is easily identified once you post it and for future reference.
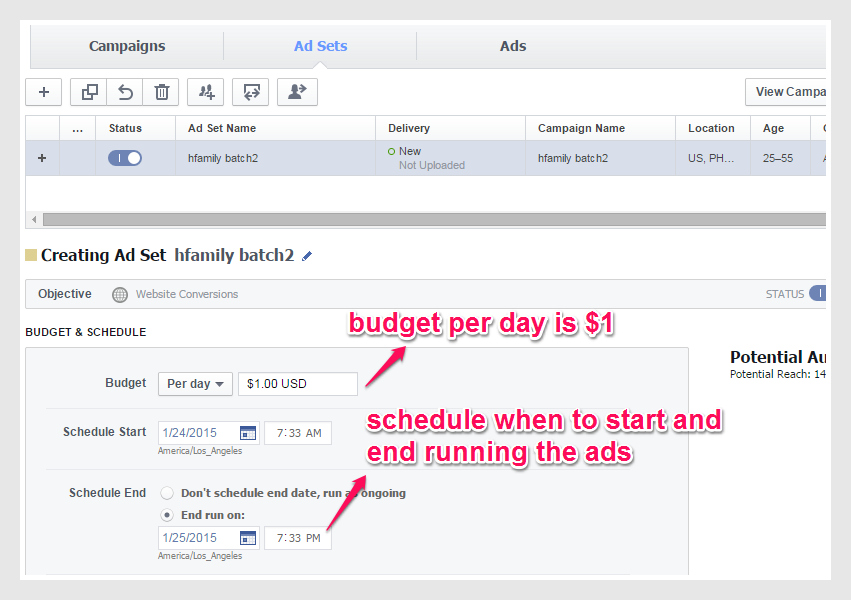
I set the budget for this ads to $1 per day. I set this ads for one day only to test if this will run properly. Then I can adjust this later if this ads run perfectly.
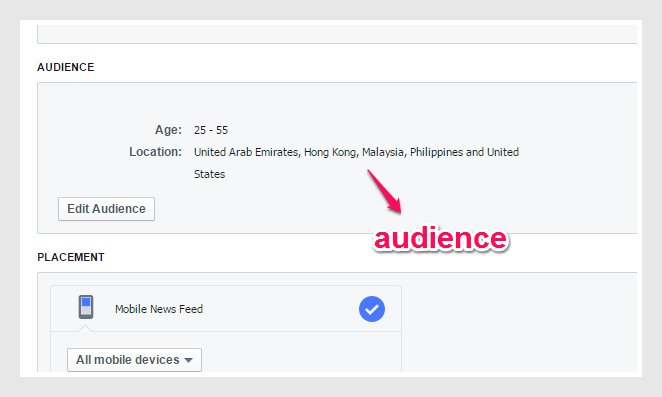
After setting the budget, I also set my audience for this ads. The age bracket from 25 to 55 years old, both male and female. I set the countries like Philippines, United Arab Emirates, Malaysia, and Hong Kong where Filipinos are working.
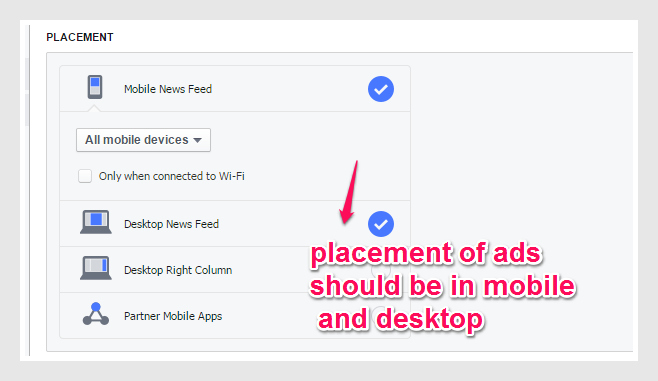
I set the placement of this ads or where to see this ads like in mobile and desktop. You just have to click the placement.
You will see also the “Ads” section below. The Facebook page on where to post this ad and the preview of the ads on the right side.
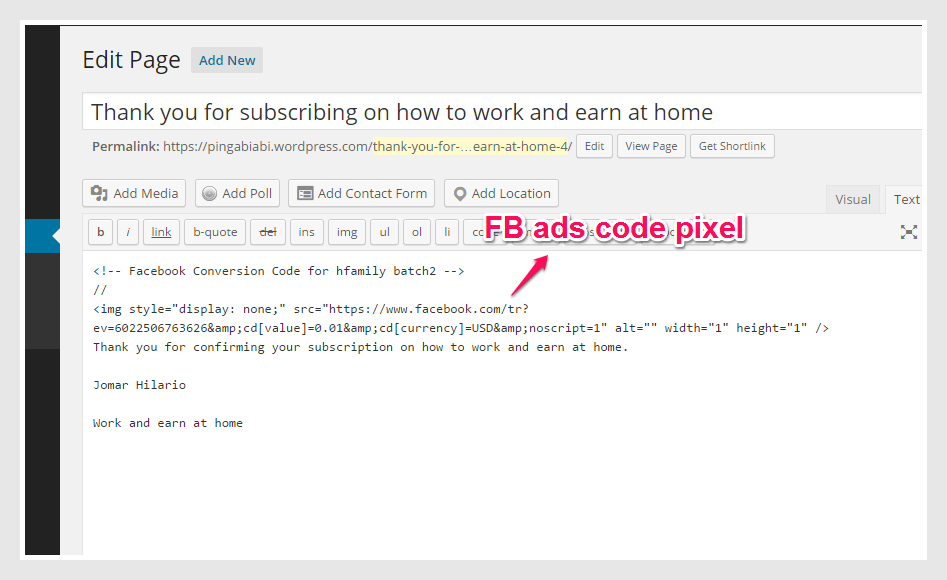
Then you have to create the pixel on this ad and paste the Facebook ads code pixel to your “Thank You” page of your website under “Text.” After pasting, click “Update.”
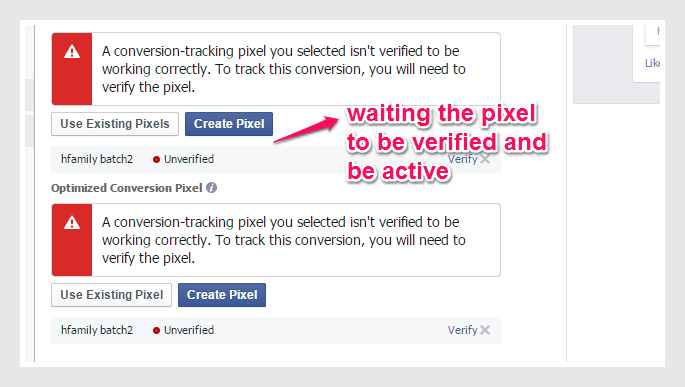
You will see the pixels unverified. Just wait for few minutes to make this “Active.”
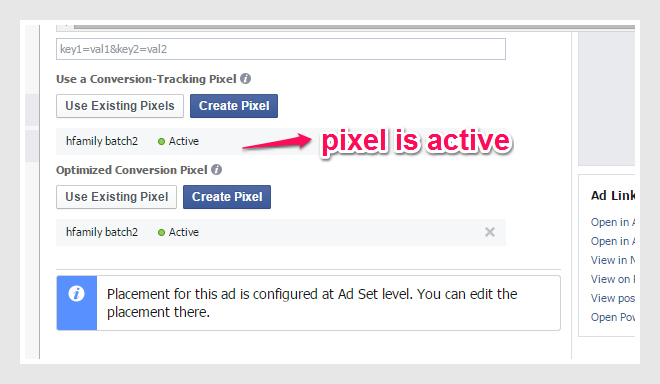
After waiting for verification, the pixels below is now active. So, you just click “Upload changes” to upload your ads for review.
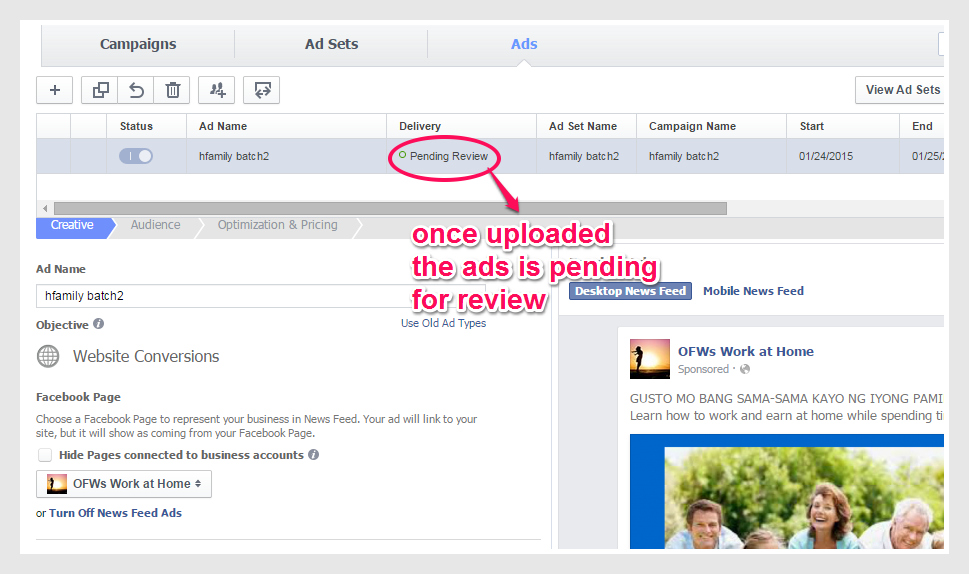
You will see the status below “Pending review” for the ads team to review your ads before posting it to your page.
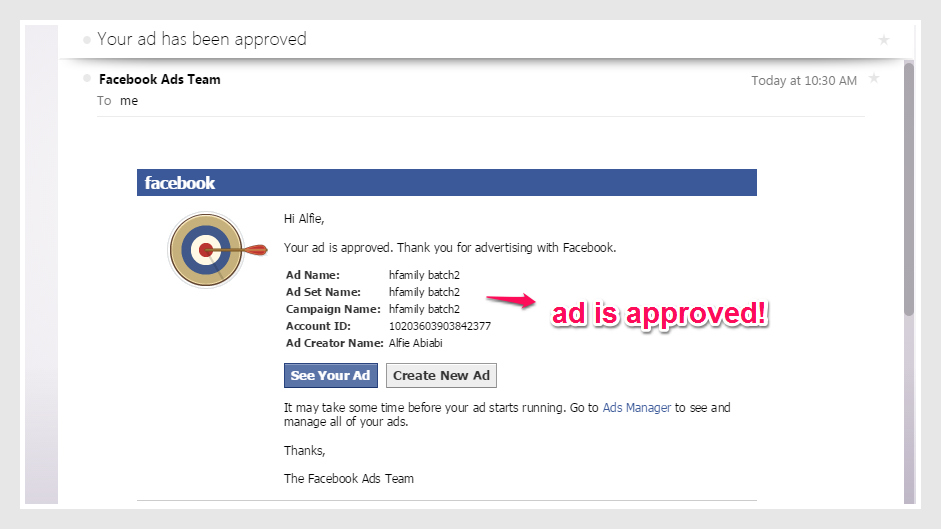
After the pending review, I received the email from Facebook Ads team below and my ad is now approve for posting!
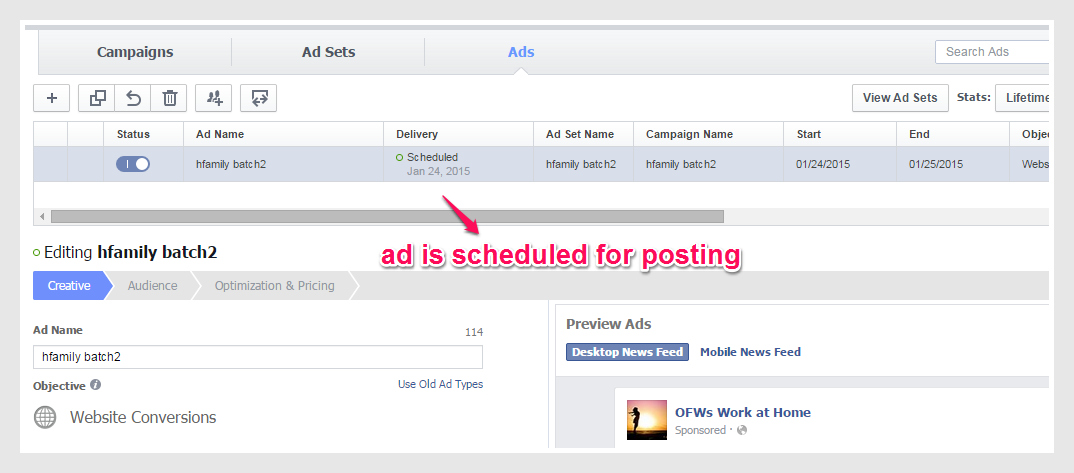
My Facebook Ads is now scheduled for posting!
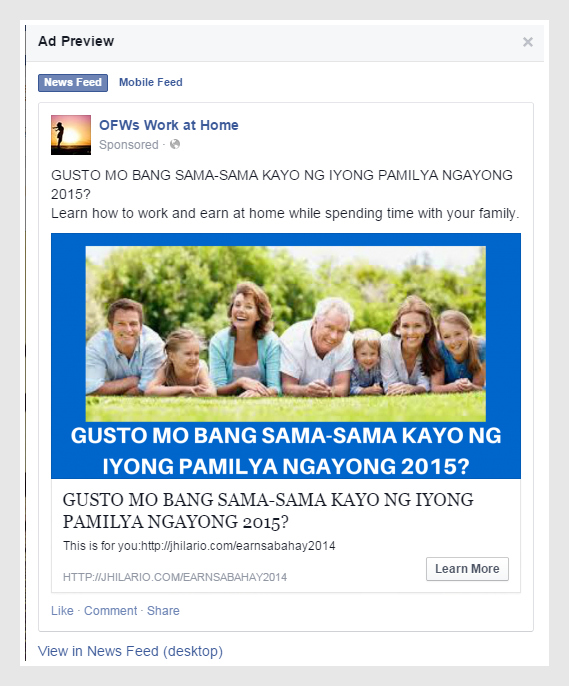
My Facebook Ads Preview below:
My Ad is now scheduled for posting.
Yehey! Another good output Alfie! It seems that you master now how to make Facebook ads after practicing many times. Yes, it pays to be patient and constant learner on how to make Facebook ads. Sooner on my next post I will tell you the result of the ads and its conversion. For now, I am so happy that my ads is approved by Facebook Ads team!
